How do you get started on making an interview video?
In this post, I want to show you how to prepare for an interview like a professional filmmaker. Here's where we're going:
Why pre-production must be a priority.
7 steps in the pre-production process.
Which is more fun:
Creating a blueprint OR walking into a finished home?
Finding a recipe and shopping for ingredients OR cooking and eating?
Booking flights, hotels, and searching Yelp for hours to find the best restaurants, OR going on the trip?
The answer is clear. But none of the fun happens without the planning.
The video production process is typically broken down into three stages.
Pre-production.
Production.
Post-production.
The Boring Part
The thing few people realize about great video content is just how much time and thought goes into Pre-production. Because of the allure of Production and Post-production (shooting and editing), beginning videographers will often pick up a camera and jump straight to them.
But they don’t have a sense of direction. They don’t know how much footage they need. They don’t know which shots make sense and which are a waste of time. How could they? They’re building a house with no blueprints.
Pre-production isn’t fun. In fact, it’s often straight up boring and tedious.
Shot lists. Schedules. Creative decisions. Emails. Meetings. Locations. Details. Often times, just sitting and thinking.
But the best videos–the ones you love and that move your soul–have a huge amount of pre-production behind them.
How time is distributed on a video project
All video production includes making a massive amount of creative decisions.
The difference between the novice approach and the professional approach is not how many decisions are made, but when they are made.
The novice makes the majority of creative decisions in the shooting phase, when it’s too late.
The professional makes the majority of creative decisions in advance.
It's more tedious to follow the model of the professional, but it’s a better process that creates better results. It's usually the case that beefing up your pre-production is the first step to getting better.
Just accept the fact that any work you love doing requires a huge amount of work you don’t.
Pro athletes still run drills.
Top musicians keep practicing.
Doctors study continuously.
So put on those overalls and remember that you have to farm the land before you eat the produce. (Need more metaphors? I apparently have plenty.)
What is the Pre-production process for an interview video?
Here’s our fictitious example:
You’ve just been hired to create a storytelling video for Tabletop Meals, a local nonprofit who needs a video to encourage donations at their annual fundraiser dinner.
What do you do next?
Step 0 – Get organized.
Before you do anything, you need to have a system in place for organizing all your information.
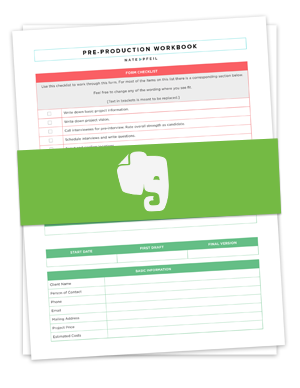
I use Evernote and you should too (unless you already have another system). Especially because I made an Evernote template that corresponds with this post.
BONUS
Free pre-production Evernote template
This template walks through all the steps mentioned in this post to take your organization to the next level.
There’s no sense in saving text documents in various places on your computer. Evernote’s free plan allows you to sync between two devices, so that you always have the information you need. Also, you can sign into Evernote online to access your files from any computer.
Step 1 – Meet with your client.
A. Get on the same page.
Sit down with the decision maker who hired you. You have to know their expectations and get the details.
You need to have this meeting regardless of how much you know about the project. You have to start communicating your creative vision to your client and mapping out a plan of action together.
Here are a few questions you might ask in your meeting:
What’s the goal of the project?
Though you probably have a sense of this already since you’ve been hired, it's always wise to double check. Surprisingly, this most important question can often be overlooked. In our example the goal is: Tabletop Meals needs a video to play at their fundraising dinner that shows the heart of their work in such a way that compels the audience to make donations.
Who is the video’s audience?
Understand who they are, how they think, where they’re from. What motivates them? What interests them? What objections might they have to your proposition? How can you speak to those objections?
Where will the video be seen first?
On mobile devices? In person? What’s the screen size? This could affect the way you compose your shots during production. If it’s being shown live, has the room been tested? What’s the lighting situation? How is the sound quality? Many don’t consider these things until the very end.
What do you want the audience to feel or do?
Do you want them to laugh? Cry? Get mad? Do you want them to have more conversations about something, or give money, or share on social media, or be entertained, or reminisce?
How long should this video be?
Videos seen on a Facebook feed and videos shown to a captive audience are entirely different. So the medium has an influence on length. Once you're aware of the medium, the video should be as long as the story needs it to be. I’ve seen 2 minute videos that seem to drag, and I’ve seen 20 minute videos that seem to fly by. The best rule of thumb: make it as short as you can without compromising the story. (This is usually shorter than you think.)
What is this video’s central message?
If you had to summarize it in a sentence, could you? If not, your vision isn’t clear enough.
What is the video’s tone?
In light of the goals and vision, how does it need to feel?
The answer to all these questions won't always be something actionable. When you go on a date, you ask specific questions to get to know someone–to get a sense of who they are so you can better relate with them. You’re not trying to gather data like a robot, you’re trying to develop an organic understanding.
Get to know the project and vision the way you get to know a person. You're not just collecting facts, you're telling a story.
Pro tip: make a standard list of questions to use in these initial meetings. This can help you think through things you may otherwise miss.
B. Ask the client for their help.
Don’t be afraid to have the client assist you wherever they can.
In our example, I wouldn’t know the clients served by Tabletop Meals. They would have a much closer connection to the stories needing to be told, so of course I would defer to them.
During this first meeting, get a list of all possible candidates and their contact info. Put them in a spreadsheet, especially if you have a lot to sort through.
You should leave from this meeting with enough information to start taking action on the project. (Either potential subjects to call and pre-interview, or confirmed subjects to schedule a shoot with.)
Step 2 – Find the Story Structure.
Once you have a general sense of the story, it's time to make it structured. On first impression that may seem like it would stifle the creativity, but actually it enables it.
There’s a great story structure floating around the internet. I once saw it attributed to Pixar, although no one seems to be sure where it actually originated.
You can see this structure in many stories:
Once upon a time there was ___.
Every day, ___.
One day ___.
Because of that, ___.
Because of that, ___.
Until finally ___.
And ever since that day, ___.
Fit the facts of your story around this structure.
Our example:
Once upon a time there was a dad and mom with five kids.
Every day, the dad mistreated the mom.
One day, the mom decided to take the kids and leave.
Because of that, the mom had to work, go to school full time, and raise her children alone.
Because of that, there were times when the family had nothing to eat.
Until finally, Tabletop Meals provided assistance to the family while the mom finished her education and got a higher paying job.
And ever since that day, the family has been taking steps towards a healthier, independent life.
The thing I love about running stories through this model is that it causes you to think more thoroughly. It provides context for the video and makes the story complete.
This structure has worked well for me in the past, but there are others. Adobe Spark and YouTube Director App have templates that can help kickstart all sorts of videos.
(See also The 22 Rules of Storytelling, According to Pixar.)
Step 3 – Find Your Characters
Once you’ve found your structure, you can make more informed decisions about who to choose. Of course, you’ll need suggestions from your client too. However, their first choice is not always the best choice so don’t be afraid to dig around to see if any others appear.
Make a list of possible people to interview.
Then call each of them and conduct a pre-interview over the phone. Pay attention to the details of the story and how well spoken they are. Ask them if they're comfortable. Take detailed notes.
Good interview videos depend on good interview subjects. Don’t settle on this point. You can be a master editor and still not make anything good out of a terrible interview.
The main thing you want in an interviewee is pretty simple: That they be interesting.
Here are three things that define interesting.
Are the relevant? – Are they qualified to tell this story? Are they personally involved in some way? Can they speak from the heart, or is it all fluff?
Are they comfortable? – Do they open up or shut down when the camera turns on? If they’re terrified and nervous, this will come across on camera. The more relaxed and conversational they can be, the better. Most of the time I will ask an interview candidate outright at the beginning, “Are you comfortable talking on camera? Does it make you nervous?” If they say they’re comfortable, that’s a pretty good sign.
Are they articulate? – This is the least important of the three, because a relevant and comfortable subject can be interesting even if they aren’t skilled speakers. But it’s still important, because if they can’t speak well at all, they won’t be a good candidate for the interview.
Step 4 – Write the interview questions.
Once you have your story structure and characters in place, it’s time to write questions for the interview.
Don’t wing it.
It's unprofessional and unproductive. You’ll shoot an interview that’s too long and still miss the information you need. Look at your story structure and think about the most important information. Now write as few questions as possible to cover all that information.
Why as few as possible? You want time to follow interesting rabbit trails. Now that you know a lot more context of the story, it should only take a few questions to give you a sense of security. The main goal is to really listen to them. Let the story air out.
You should show up to your interview with the questions in hand, 100% ready to go.
PRO TIP 1: Don’t ask yes or no questions. In fact, you might not even ask questions at all. You may just need prompts.
Example:
Don't say: "Were you in a tough situation before Tabletop Meals helped you?"
What do they say to that? “Yes.” Not enough for a video.Do say: "Tell me about your life before Tabletop Meals."
They’re much more likely to open up.
PRO TIP 2: Be brief and embrace silence. If they’re comfortable on camera, they’ll usually fill in the blank space. Don’t be afraid to hold your tongue. Do it until the silence is a little awkward.
Step 5 – Visualize.
Now that you’ve done the research for the project, you’re far more prepared to think creatively.
Think about everything you know about this project so far. Now close your eyes. What do you see? What do you hear? What do you want to feel? Hit play on the video in your head before you’ve captured a single frame. It’s time to start building.
If you’re feeling stuck, go to the things that inspire you already. My energy around a video almost always starts with the music. Video inspiration is usually an overflow of musical inspiration.
Think about how you want to present this story. How can you approach it creatively and artistically? What can you do well? What can you push yourself in? Don’t settle.
You’re a creator.
There’s light inside you that you need to show the world. Treat every project like it’s your last chance to let that light out.
Comb through your plan piece by piece:
Think through ways of making the interview interesting. – What should the shot background be? How should I light it? How should the camera move? How should I compose the shot? What have I found inspiring lately? Why did it move me?
Think creatively about b-roll. – What should be the setting? How should the camera move? How could I push myself to do something I’ve never done?
Think about the feeling of the music. – Should I keep it simple or go really cinematic? Should I pick the straightforward approach and select music that fits the mood, or should I juxtapose contrasting music to highlight the emotion?
You may not get a wind of inspiration or find any new way of doing it. But if you want to grow, you need to make a habit of thinking through these things.
Step 6 – Plan the interview shoot.
Call or email your talent asking for their availability. (Obvious? Yes. But communication must be a priority if you want to be professional.)
Scout a location (unless you know it already). Listen to the sound environment of your location. Is it quiet enough? Does it echo? If so, keep looking until you find the best possible environment. Ideally you would want a location that's visually attractive as well and full of natural light. But if you have to choose one (good sound or good visual environment), choose sound.
Make your decision.
Line up all the assistance you need. Are you by yourself? Or do you need makeup, sound tech, grip, DP?
Step 7 – Plan the b-roll.
Once you have a basic creative approach, think about what’s needed to accomplish the b-roll.
Usually it works best to capture b-roll after the interview has been shot. That way you can account for unexpected things that were said in the interview and shoot accordingly.
Much of b-roll planning has to do with what level of detail you wish to control. In documentaries, you can afford to wing it a little and follow what happens.
Even if that’s the case, it’s wise to take these steps:
Make a shot list. – Over time, you can begin compiling a master list of possible b-roll shots. From there you can select ones you think might work well in your story. Make a full list of everything you need to get your video done.
Make a schedule. – How long will each shot take? When is the talent available? When do you need to shoot to make the most of the sunlight? Account for drive time. Don’t forget about lunch.
Think through equipment. – What is needed for the shoot? Are you bringing all the gear you need? Are you bringing too much? Too much equipment can be a bigger problem than not enough when you’re shooting on the go. Who will help haul it all? Are your batteries charged?
Think through setting. – Where should we film this? Do we have permission? Does it make sense in the story? What should our subjects be doing? How is the lighting?
Conclusion
When you’ve gone through these steps, you should have everything down in writing:
The most crucial information about the project, vision, goals, and audience.
The structure of the story.
Your list of characters / interviewees.
Interview questions.
The creative vision.
The interview shoot plan.
The b-roll shoot plan.
Of course, things don’t always go according to plan. But by planning as many details as you can, you prove to your client you’re organized and professional.
Your work will thank you for it too.
If you missed it
DOWNLOAD MY Free Evernote Template
This pre-production workbook walks you through every stage of this post. It's just one of my resources you can access for free.
Sign up to download and use it on your next project.


